电脑大家应该不怎么陌生吧!现在电脑已经普及到大多数人的家庭之中了,电脑的用途非常地广,不同年龄段、不同行业的人对电脑的用处不同。但是对于很多的年轻人来说电脑最大的用途就是玩游戏了。电脑游戏大家肯定玩过吧!它可以使人上瘾。
电视版游戏攻略,PC可作参考
The Darkness II《黑暗2》的收集物品总计有29个,几乎都藏放在不难发现的位置,如果已经玩过一轮的玩家,可以用收集品的名称来找相对位置,以下就是全29个收集物品的位置攻略:
Relic(1/29):Roanoke's Bane
Chapter:Payback
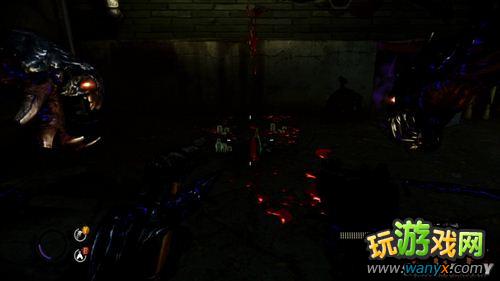
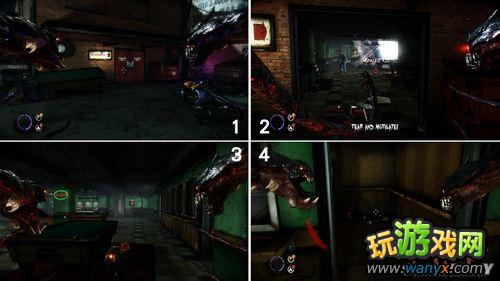
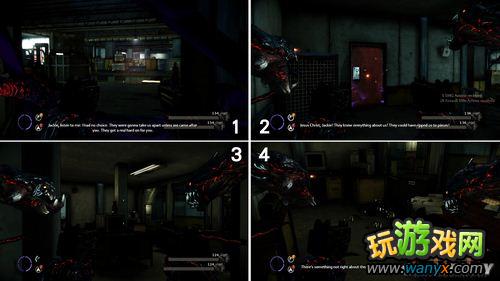
触发建筑物爆炸把主角被炸飞的事件后,游戏会要求玩家捡起地上的乌兹冲锋枪,并手拿双枪继续进行游戏的桥段这边,使用触手破坏掉红色逃生门便能看到Roanoke's Bane。
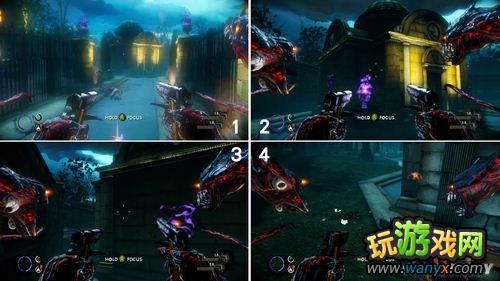
Relic(2/29):Yhwh's Lament
Chapter:Payback
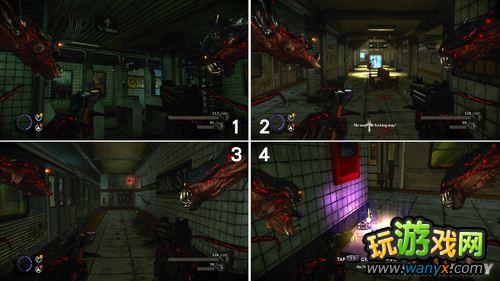
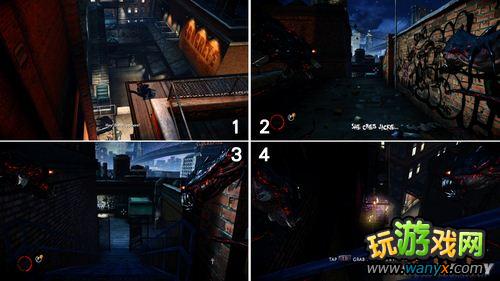
来到图示一位置的地铁站,玩家会在月台附近遭遇到数名敌人的袭击,此时面对图示二位置的月台右后转弯到图示三位置,Yhwh's Lament就藏放在尽头处的走廊上。
Relic(3/29):True Revelation
Chapter:The Family
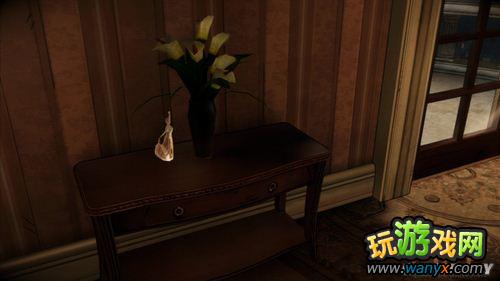
二楼卧房的小桌子上。
Relic(4/29):Sister of Light
Chapter:Q&A
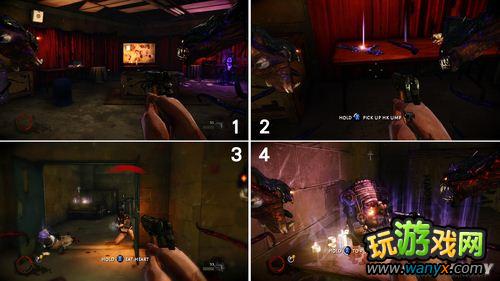
杀入酒吧将一楼的敌人统统清掉之后,图示三位置的右手边有一间电动房,Sister of Light就放在角落的地上。
Relic(5/29):The Dark Man
Chapter:Q & A
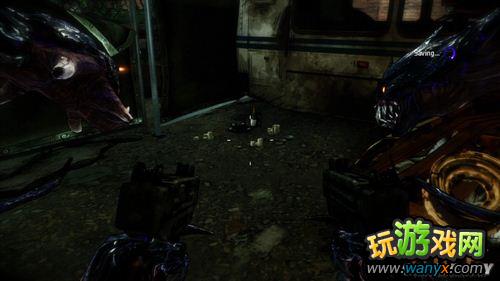
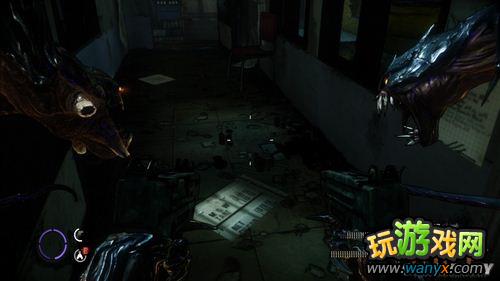
从酒吧的后门出来后,使用车门当作盾牌挡住敌人的攻击,在尽头处有一辆已报废的公车,The Dark Man在靠近公车车尾的地上。
Relic(6/29):The Trinity
Chapter:Q&A
打完本关的魔王来到墙的另一边,搜索正前方的货柜屋取得The Trinity。
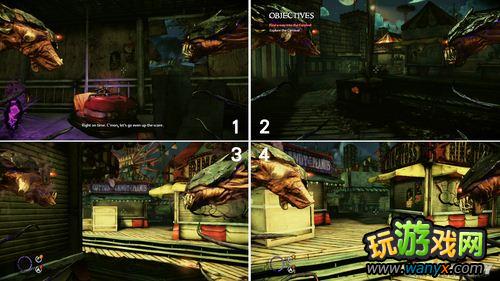
Relic(7/29):The Graven Image
Chapter:Q & A
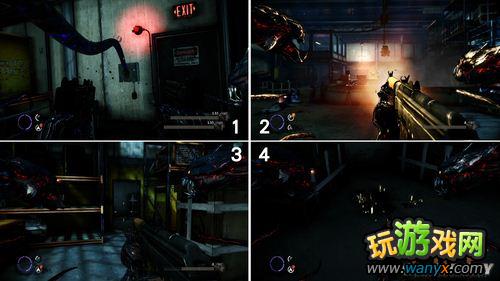
触发主角与女友在咖啡厅里跳舞的事件后,来到图示一位置的工厂进去展开大屠杀,The Graven Image在破坏掉一道逃生门之后的房间里。将该区域内出现的敌人都杀掉,并找到图示三位置的房间出入口便能取得。
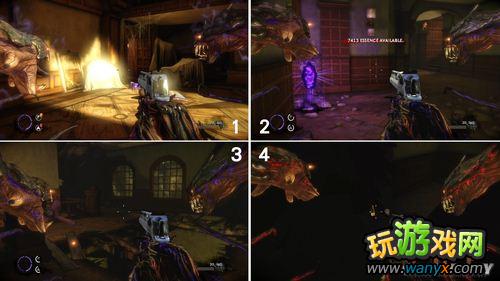
Relic(8/29):Chime of Deliverance
Chapter:Q & A
图示四位置的办金室地上。
Relic(9/29):The Brothers of Men
Chapter:Strong Silent Type
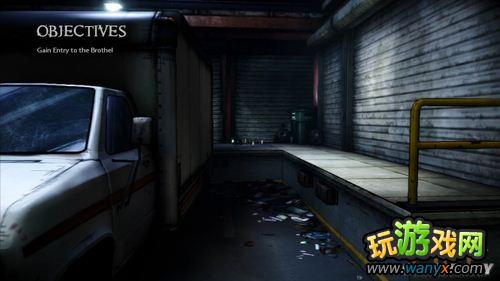
游戏起始处往右后方卡车的方向前进,The Brothers of Men在卡车后方的码头平台上。
Relic(10/29):The Key of Mictlan
Chapter:Strong Silent Type
完成使用小鬼破坏掉总电源的事件后,沿着游戏指引线前往目的地时,图示三位置会杀出数名拥有恶魔力量的敌人,将他们杀掉后即可从图示四的位置取得收集品。
Relic(11/29):Thumb Screws
Chapter:Deal With the Devil
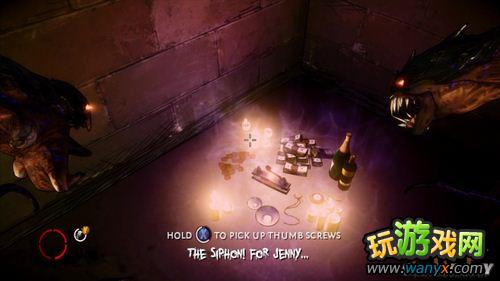
从被钉在架上的危机中逃脱,Thumb Screws在房间的角落地上。
Relic(12/29):The Fool's Phylactery
Chapter:Deal With the Devil
逃出失火的建筑物顶楼,玩家一定会经过图示二漆满涂鸦的墙壁,当玩家前进到图示三的铁桥上时往右手边看,The Fool's Phylactery被藏放在平台上得用触手抓取才能取得。
Relic(13/29):Winged Demon
Chapter:Home Invasion
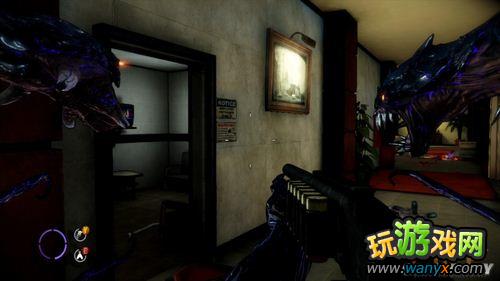
从停车场杀到建筑物内准备搭电梯上楼前,破坏左手边警卫室的铁门,进入后便能轻松找到Winged Demon。
Relic(14/29):The Blinding Sun
Chapter:Home Invasion
杀进家里靠近厨房旁边的房间里,The Blinding Sun在该房间的壁炉旁。
Relic(15/29):Cain
Chapter:Saying Goodbye
触发魔王的第一次出现,Cain在墓园最右边花圃的地上。
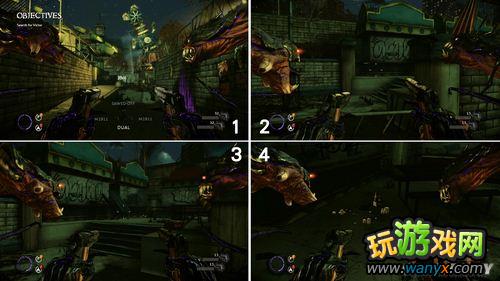
Relic(16/29):Engraved Skull
Chapter:Saying Goodbye
来到图示一的长走廊,Engraved Skull被藏放在图示二的建筑物后方。
Relic(17/29):The Lantern of St. Anthony
Chapter:Fun and Game
从秘密通道进入游乐园后,顺着左边的道路辨认图示场景,并在Ring Toss的游乐商店后方找到The Lantern of St. Anthony。
Relic(18/29):Af and Hemah
Chapter:Fun and Game
游戏检查点的起始处(图示一),前方会出现二名敌人正准备逃跑,此时右后转弯往尽头处前进(图示三),即可在地上取得Af and Hemah。

Relic(19/29):The Abysmal Maw
Chapter:Fun and Game
触发第二次游玩射击小游戏的事件后,收集物品就在商店左手边的房间里,不过玩家得先清光该区域附近所出现的敌人,收集物品的小门才会随着敌人的出现而开启。
Relic(20/29):Crescent of the Sun
Chapter:Fun and Game
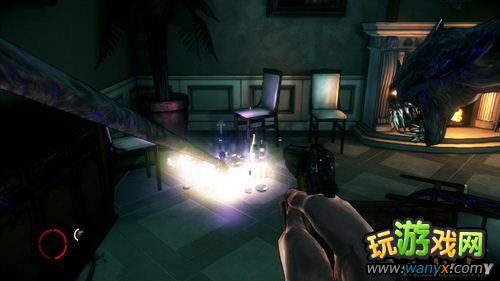
Crescent of the Sun在图示位置的桌子上,只要稍微从旁边绕进去即可。
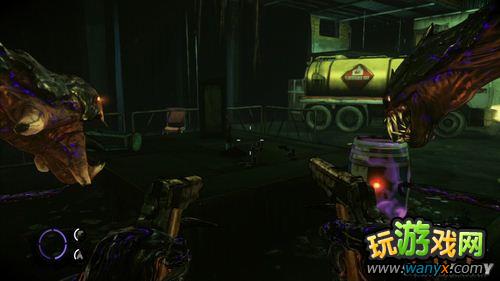
Relic(21/29):Siddhartha's Tears
Chapter:Fun and Game
一路顺着剧情发展前进,玩家一定会经过如图示位置的黄色油罐车,Siddhartha's Tears就在油罐车侧边的桌子上。
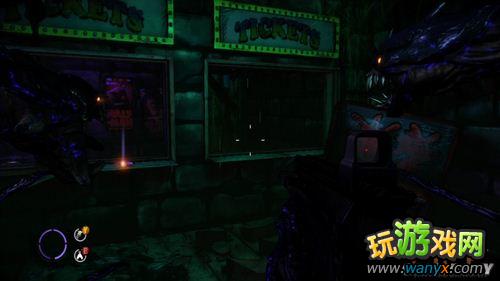
Relic(22/29):The Mark of Cain
Chapter:Fun and Game
进入鬼屋大冒险的游戏设施,使用恶魔手臂抓取右边窗口地上的物品,即可取得The Mark of Cain。
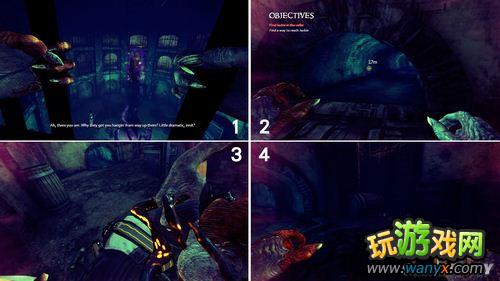
Relic(23/29):Pope John XII
Chapter:Rat In A Maze
触发如图示一的事件后,沿着指引线来到图示三位置杀掉二名巡逻的敌人,进入右手边的房间即可找到收集品。
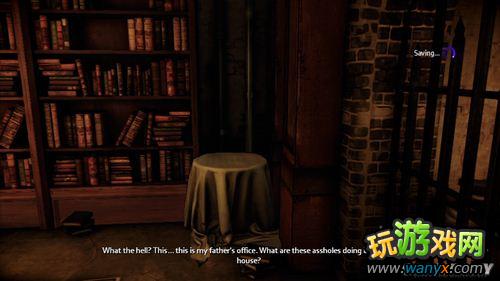
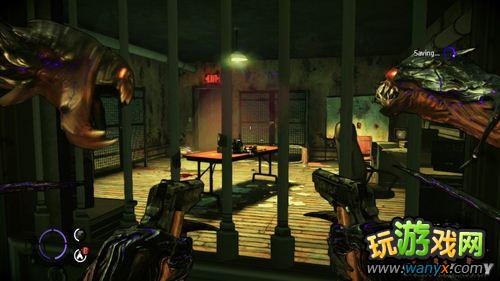
Relic(24/29):Reliquary of the Blessed Blood
Chapter:Rat In A Maze
主角被释放后会来到一个老旧的房间取得Model 1887,调查图示位置的小桌子取得Reliquary of the Blessed Blood。

Relic(25/29):The Silent Night
Chapter:Homecoming
游戏起始处附近,破坏掉图示三位置右手边的木板后进入,便能在图示四位置的尽头找到收集品。
Relic(26/29):The Deceiver's Grasp
Chapter:Homecoming
在一场持久战中存活下来后,沿着指引线来到图示三的位置,此时不要直接从缺口跳下去,利用木板走到缺口的另一边搜索,收集品被藏放在尽头处的洞口。
Relic(27/29):The First
Chapter:Last Stand
游戏起始处触发打王的区域,从缺口来到图示中的房间后,收集品就在右手边的地上。
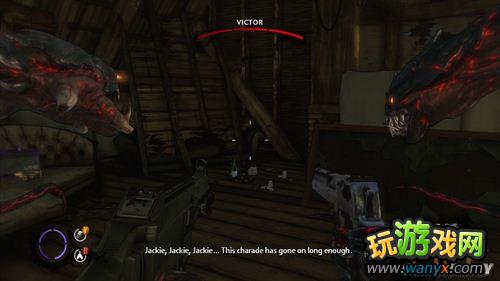
Relic(28/29):Ashes of the Unnamed
Chapter:Heart of Darkness
靠近游戏起始处不远的地方,当玩家触发女朋友被禁锢的事件后,立即往右手边的阶梯看去,不难发现本关的收集物品。
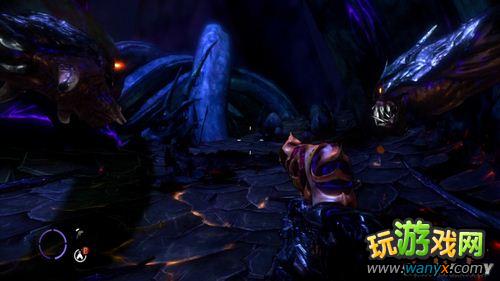
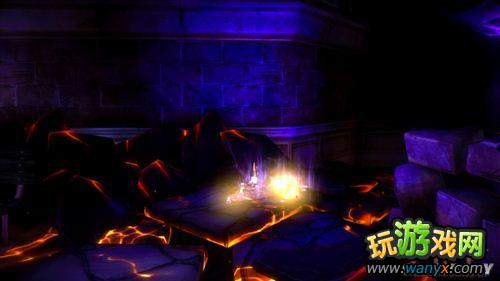
Relic(29/29):Prism of the Brothers
Chapter:Heart of Darkness
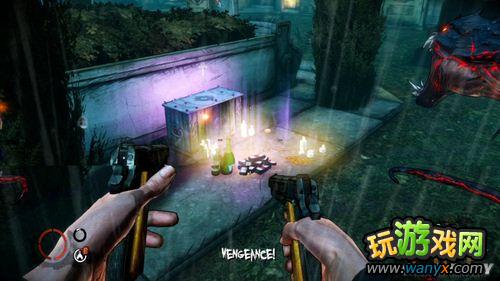
距离前个收集物品不远的地方,玩家会经过如图示位置的场景,最后一个收集品就在该位置的右手边地上。
玩游戏可以在很大程度上让大家放松放松,但是我建议大家不要把过多的时间投入到工作当中,因为这样的话大家很有可能上瘾,这样不利于大家的工作或者是学习。
